
How to Make a Bedside Table?
Have you ever faced this problem at bedtime? Your phone, glasses, or book have no place to rest. If so, consider making a pair of bedside tables yourself on a free weekend. A DIY bedside table is a fun project. It also gives you furniture that fits your space perfectly. Follow the steps below. You can make one easily.

What is a Bedside Table?
A bedside table is a small piece of furniture. It sits next to your bed. It is compact and useful. It provides a handy spot for bedroom items. Unlike large furniture like wardrobes, bedside tables focus on easy access. You can reach your items without leaving bed.
Bedside tables have many types. Some have just a top and legs. Others include drawers or cabinet doors. Their size can also change to match your bed and room. Your bedroom may be modern, country-style, or industrial. A suitable bedside table design exists for each style.
Fundamentally, a bedside table is a functional helper. It solves storage problems for small items. It also completes your bedroom layout. If you enjoy DIY, making your own lets you add personal touches. This makes the furniture unique and tailored to you.
What are the Uses of a Bedside Table?
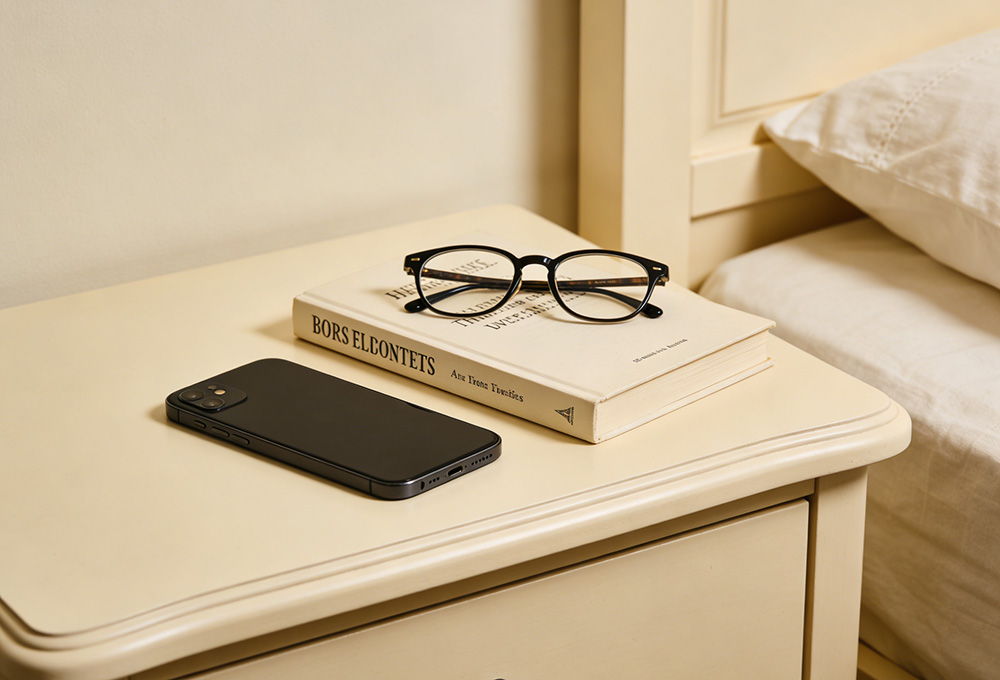
The most basic use is holding daily essentials. Place your phone on it to find it easily in the morning. Keep a glass of water there for night time thirst. Books, magazines, or an e-reader can go there too. This is perfect for reading before sleep.
Tables with drawers or cabinets help organize small items. This keeps your bedroom tidy. Store glasses, watches, or hair ties inside drawers. This prevents loss or dust. Some people use the space below for a small trash can or tissues. This adds convenience.
Besides utility, bedside tables decorate your room. A well-designed table matches your bed and other furniture. It improves the whole space. Place a small plant, photo frame, or decorative lamp on top. This adds warmth and makes your rest area more cozy.
Materials Needed for Making a Bedside Table
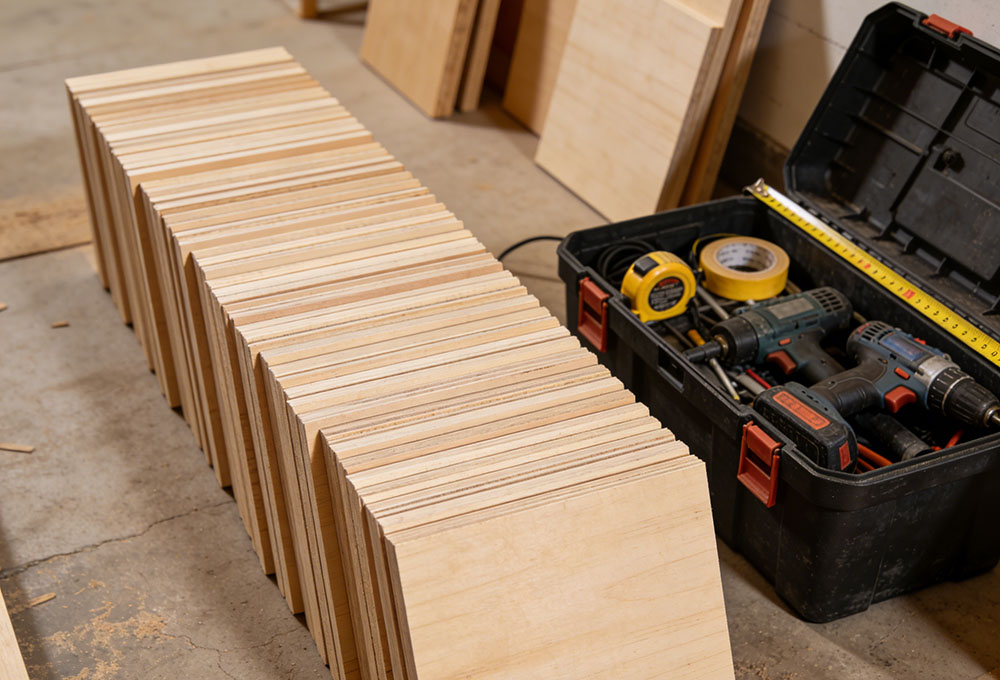
Wood is the main material. It is easy to work with, strong, and looks natural. The wood size depends on your desired table size. Here is a general guide for wood panels:
Tabletop: Use a 2.5-3 cm thick panel. A common size is 40 cm long and 35 cm wide. Adjust this if needed. Side panels: Use two 2 cm thick panels. Each should be 50 cm long and 35 cm wide. They support the left and right sides. Back panel: Use one 1.5 cm thick panel. It should be 40 cm long and 50 cm wide. This stabilizes the structure and stops items from falling.
Drawer panels (if making a drawer): Use five 1.5 cm thick panels. This includes a bottom panel (38 cm long, 33 cm wide), two side panels (33 cm long, 15 cm wide), a front panel (38 cm long, 15 cm wide), and a back panel (38 cm long, 15 cm wide).
You will also need extra materials. Wood glue bonds panels tightly. Get 120-grit and 240-grit sandpaper to smooth the wood. Anti-rust screws strengthen connections. These small items greatly affect your table's durability.
Tools Needed for Making a Bedside Table
Tape measure: Use it to measure wood panels and mark cuts. Choose one with clear scales and at least 2 meters in length. Table saw: Use it to cut wood to size and shape. A circular saw or handsaw also works, but a table saw is more efficient and straight. Electric drill: Use it to drill holes for screws. Prepare different drill bits for various screw sizes.
Slide rails: These are necessary for drawers. Choose rails that match your drawer size, usually 30 cm or 35 cm long. Good quality rails ensure smooth opening and closing. Mechanical buckles: Use these for cabinet doors. They fix the doors and allow smooth operation. Choose buckles that are easy to install and lock firmly.
Nails: Use them to help fix wood panels, especially the back panel. Choose galvanized nails to prevent rust. Paint: Use it to decorate and protect the table. Choose water-based paint or wood stain. You also need a paintbrush or roller, and a mask for protection.
Design the Bedside Table
Designing the shape is your first step. Let your personal taste and bedroom style guide you. For a modern room, choose a simple rectangular table with smooth lines. For a country feel, consider curved edges or simple carvings.
If you need more storage, design a table with drawers. For open storage, add a bottom shelf. Avoid overly complex shapes, as they make the project harder. Beginners should start with a simple rectangular design. It is easier to build and still looks great.
When designing size, consider your bed and the surrounding space. The table height should match the bed or be 2-5 cm higher. This makes grabbing items easy while lying down. Most tables are 50-60 cm tall. Adjust the length and width based on your space. For small areas, choose a compact size like 35 cm by 30 cm. For larger spaces, a bigger table offers more storage.
Before cutting wood, draw a simple sketch. Mark the exact size of each part, like the tabletop and side panels. Check that the sizes suit your space. This step prevents mistakes during cutting and assembly. It is a small step that saves much hassle later.
Assemble and Install the Bedside Table
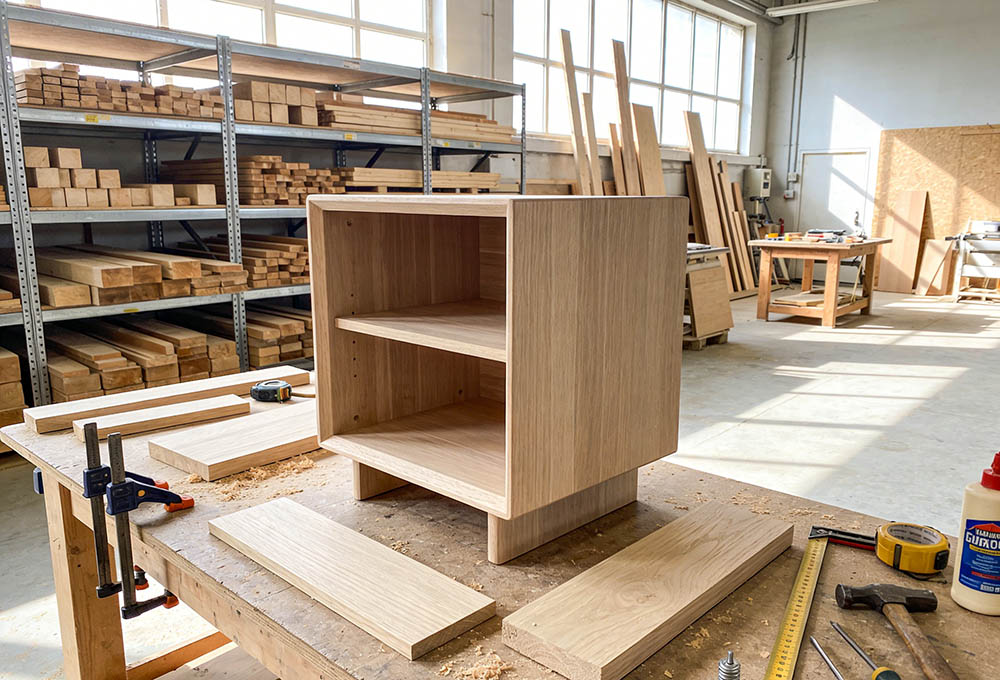
First, sand all cut wood panels. Use 120-grit sandpaper to remove burrs and sharp edges. Then use 240-grit sandpaper to make the surface smooth. Wipe the panels with a clean cloth to remove dust. Smooth wood is easier to assemble and looks better when painted.
Next, assemble the main frame. Apply wood glue to the top edges of the two side panels. Align the tabletop with the side panels and press firmly. Use an electric drill to make holes where they meet. Space the holes 8-10 cm apart. Drive screws into the holes to secure them. Ensure the drill bit is smaller than the screws to prevent wood splitting.
After fixing the tabletop and sides, install the back panel. Apply wood glue to the edges of the back panel where it touches the frame. Align it and use nails to fix it. Drive the nails at a 45-degree angle for a stronger connection. Finally, check if the frame is stable. If loose, add more screws or nails to reinforce it.
Install Slide Rails or Mechanical Buckles
Attach one part of the slide rails to the side panels. Install the other part on both sides of the drawer. Ensure the rails on the drawer align with those on the panels. This allows the drawer to slide smoothly. Test the drawer several times after installing. If it sticks or feels loose, adjust the rail positions.
If your table has cabinet doors, install mechanical buckles. Decide their position, usually inside the side panels and on the door. Fix the buckle base to the side panel with screws. Attach the other part to the cabinet door. Test the door after installation. Ensure the buckle holds the door firmly but allows easy opening.
Paint the Bedside Table
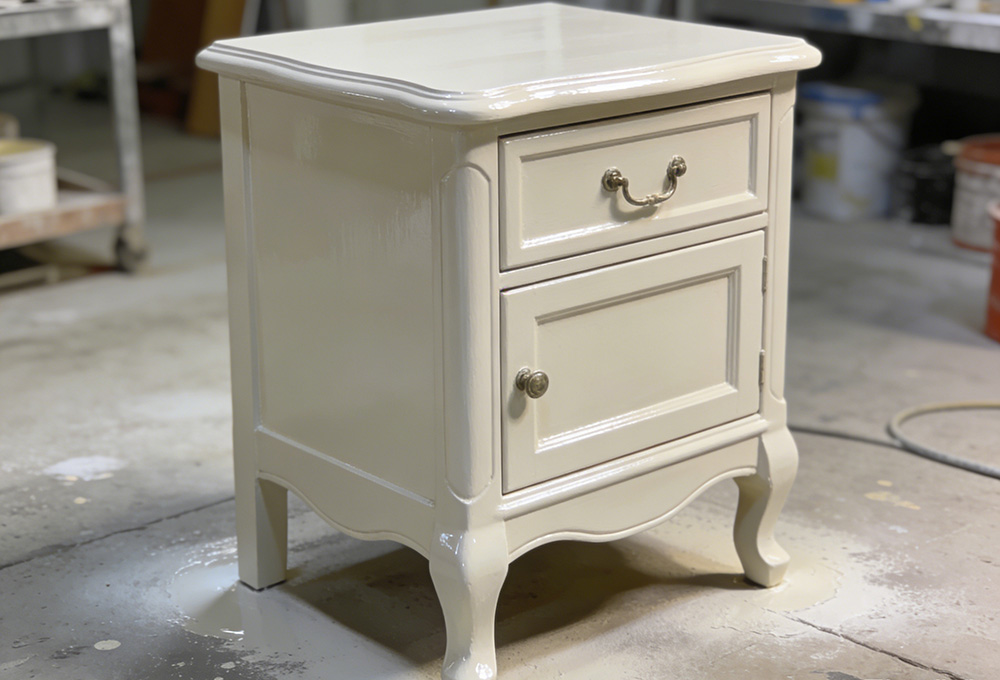
Use a brush or roller to apply paint evenly. Follow the wood grain direction for a smooth look. Apply thin coats instead of one thick coat. Thick paint drips and dries unevenly. Let the first coat dry completely. This usually takes 2-4 hours, depending on the paint and room temperature.
Once the first coat is dry, lightly sand the surface with 240-grit sandpaper to fix uneven spots. Wipe off the dust and apply a second coat. Repeat until the color meets your needs. After the final coat, place the table in a well-ventilated area to dry fully. This takes 24-48 hours. Do not touch or use the table during drying, as this can damage the paint.
Choices After Failed DIY
If your DIY bedside table fails, do not worry. Buying a ready-made one is a good option. Furniture stores offer many styles and sizes to fit different needs and decor. Consider your bedroom size, bed style, and budget when shopping. You will find a suitable one easily.
If you need many bedside tables, buy from a wholesale furniture manufacturer. They offer better prices and more styles. Find wholesalers online, at furniture shows, or through recommendations. Many allow customization of size and style. This helps you get exactly what you need.
Whether you DIY or buy, the goal is a practical and nice-looking bedside table. Do not stress about a failed DIY attempt. Treat it as a fun learning experience. Then choose the best way to get the table you need. There is no wrong choice if it fits your space and lifestyle.
Making a bedside table yourself is a fun and rewarding DIY project. Start by understanding what a bedside table is and how it is used. Then gather materials and tools, design the shape and size, assemble the frame, install accessories, and finally paint it. Each step requires patience and care. Following this guide will help you make a personalized table that fits your needs.